How to Fix the “Not Secure” Error After Installing an SSL Certificate on Namecheap (cPanel Hosting)
Installing an SSL certificate should make your website secure — but sometimes, even after everything appears correctly set up in Namecheap or cPanel, browsers like Google Chrome still display the dreaded “Not Secure” warning.
Don’t worry — this is usually easy to fix.
Here’s a step-by-step guide to help you resolve SSL errors and ensure your website shows the secure padlock icon.
Step 1 — Activate and Install Your SSL Certificate
-
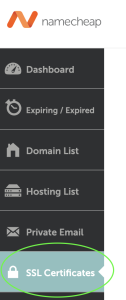
Log in to your Namecheap account.
-
Go to Dashboard → Products → SSL Certificates.
-
Click Activate next to your SSL (e.g., PositiveSSL or EssentialSSL).
-
When prompted for CSR, choose Server-side automation (cPanel) — this lets Namecheap automatically install the SSL on your hosting account.
-
Log in to cPanel, scroll to the “Exclusive for Namecheap Customers” section, and click Namecheap SSL.
-
Select your domain and click Install.
This process will automatically:
-
Generate a CSR,
-
Validate your domain, and
-
Install the SSL certificate (usually issued by Sectigo Limited).
If Chrome or another browser still shows “Not Secure”, continue with the steps below.

Step 2 — Check for Old or Expired Certificates in cPanel
-
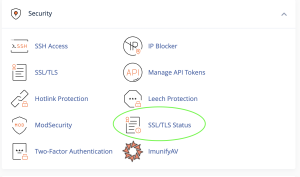
In cPanel, go to:
Security → SSL/TLS → Manage SSL Sites. -
Locate your domain (e.g., yourdomain.com).
-
Check the expiration date — if it’s past or mismatched, an old SSL certificate might still be active.
-
To update it:
-
Click Update Certificate
-
Choose Autofill by Domain
-
Select the new certificate issued by Sectigo Limited
-
Click Install Certificate
-
You should then see a success message:
✅ “SSL Host Successfully Installed!”
Step 3 — Verify DNS Settings
Ensure that both your root domain and the “www” subdomain point to the same IP address as your hosting server.
If you’re using Namecheap DNS:
-
Go to Domain → Advanced DNS.
-
Confirm these records:
-
A Record for
@→ points to your hosting IP -
CNAME Record for
www→ points to@
-
If these records don’t match, your “www” version might not load over HTTPS correctly.
Step 4 — Force HTTPS Using .htaccess
If your SSL is valid but your site still loads over HTTP, you can force HTTPS manually.
-
Open your website’s root directory (
/public_html) using File Manager in cPanel. -
Find or create a file named .htaccess.
-
Add the following code:
RewriteEngine On

RewriteCond %{HTTPS} !=on

RewriteRule ^ https://%{HTTP_HOST}%{REQUEST_URI} [L,R=301]
-
Save changes and refresh your website.
This redirects all visitors to the secure HTTPS version automatically.
Step 5 — Clear Cache and Verify the SSL
Finally:
-
Clear your browser cache (especially in Chrome).
-
Clear any WordPress caching plugins if applicable.
-
Reload your website using https://yourdomain.com.
Then verify your SSL using a trusted tool like:
👉 SSL Shopper Checker
or simply click the padlock icon in your browser’s address bar and confirm the certificate shows:
Issued by: Sectigo Limited
Status: Certificate is valid
✅ Your Site Should Now Be Fully Secure
Once these steps are complete:
-
Your website will load over HTTPS only.
-
Chrome and other browsers will show the secure padlock instead of “Not Secure”.
-
Your certificate will renew and validate automatically through Namecheap when due.


You May Also Like
Typical Phising and Smishing Attacks and How to Combat Them

The Power of Cloud-Based Services: Simplifying and Enhancing Server Setups